How To Grow Mushrooms From Home and Have Fun Doing It


By Sonja Henrikssen
The rewards of learning how to grow your own mushrooms at home go far beyond simply having a convenient supply. The mushroom-growing process helps to connect you more deeply with your food and medicine, integrating you into the mushroom lifecycle as they become integrated into your daily practices. The slow, intentional work of growing mushrooms is a natural catalyst for introspection and encourages us to live in the moment; you can’t rush mushrooms.
Growing mushrooms can help guide your sense of purpose—why are you growing mushrooms in the first place? What feelings does the growing experience bring up for you? How does consuming mushrooms that grew alongside you in your home feel different from consuming mushrooms purchased elsewhere?
Here you’ll get acquainted with the mushroom lifecycle and the basics of mushroom cultivation, discover different types of mushrooms you can grow at home, and learn how to use tools like integrative journaling to track, improve, and learn more from your mushroom growing journey.
How Hard Is It To Grow Mushrooms At Home?
It would be misleading to say that mushrooms are easy to grow at home. That said, even if you kill every houseplant and have no green thumb, you can still learn how to grow mushrooms. Learning something new always comes with trial and error. But, even complete beginners can have home-grown, fresh mushrooms within a few weeks using the right techniques. Pre-inoculated mushroom growing kits can yield results within a few days, and boost your confidence if the mushroom cultivation process still mystifies you, but they’re not necessary.
Don’t underestimate yourself, first-time mushroom growers! By reading how-to guides, using resources like a mushroom cultivation journal, and having a little patience, you’ll be enjoying the fruits of your labour in no time—pun intended.

Getting Comfortable as a Beginner: Using the Mushroom Cultivation Journal
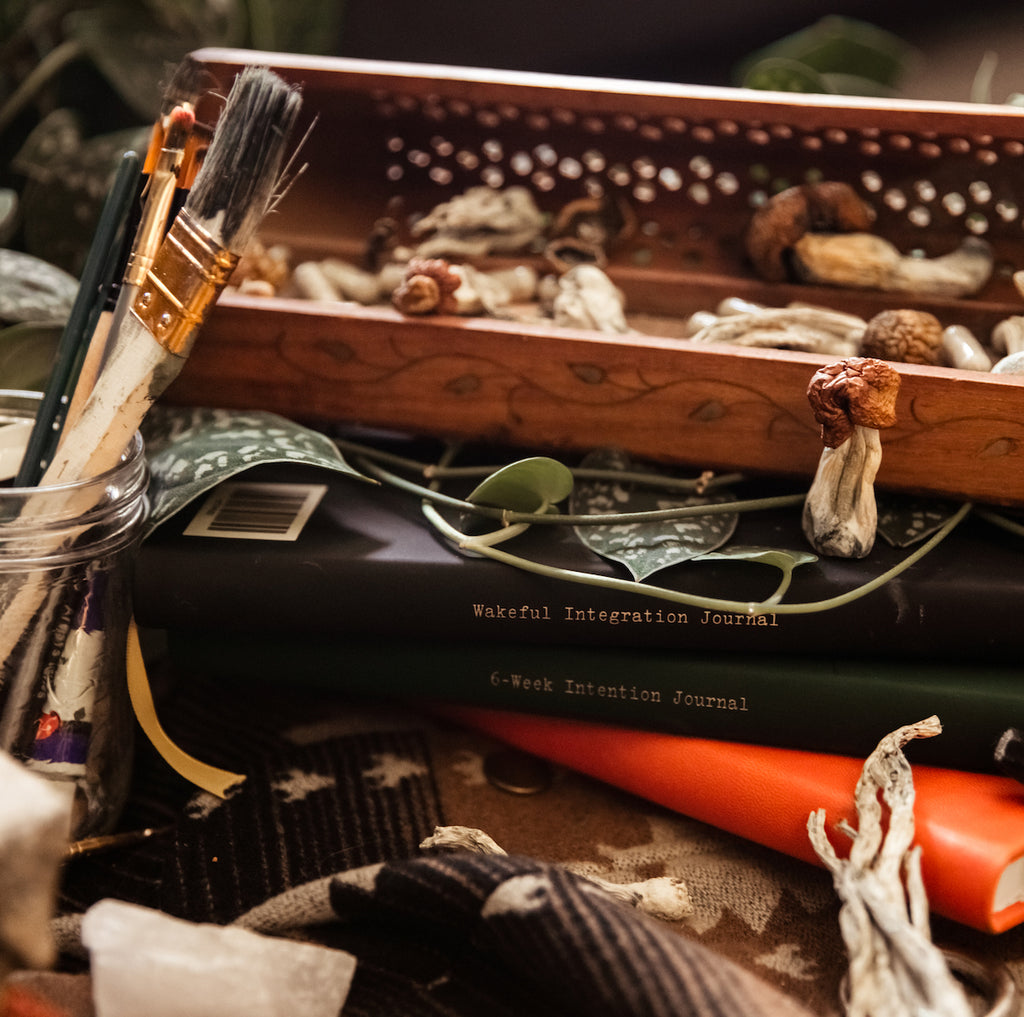
Written by mycologist Caine Barlow of Guerrilla Mycology, the Wakeful Mushroom Cultivation Journal is a simple, interactive, step-by-step guide to learning how to grow mushrooms at home while documenting your journey and integrating mindfulness. The journal even has an entire section dedicated to teaching you how to use it in order to maximize your success. Barlow covers everything you could need and more to get started without any background knowledge at all. And, when you’re comfortable with the process, he also encourages you to experiment with your own methods.
Think of the Mushroom Cultivation Journal as both an educational resource and a private space where you can reflect and keep notes on your first grows. This journal isn’t just for beginners, either; even experienced mushroom growers will find value in the reflective and creative space it provides.
Before you start your first grow, spend some time reading and answering the prompts in the first section of the Mushroom Cultivation Journal. If you’d like, you can even do a practice grow using cardboard as your growing medium. The journal starts slow and helps you build to more difficult techniques like PF Tek and bulk growing.
How To Grow Mushrooms From Home: the Main Steps/Stages
You can find endless resources for growing mushrooms online and in books and articles, but you’ll also find a lot of conflicting information. Finding clear instructions for growing mushrooms is difficult when everyone has their own way of doing things. To simplify the process, the Mushroom Cultivation Journal puts all the information in one place in an easy-to-follow order that won’t leave you overwhelmed with 100 tabs open on your computer.
Of course, before you can grow mushrooms, you’ll need to understand exactly what is happening when you do each step of the process.

The Mushroom Life Cycle: From Spore To Fruiting
When you grow mushrooms at home, you start your journey at the beginning of the mushroom’s lifecycle.
Mushrooms are the fruiting bodies of certain fungi and are typically the only visible part of the larger organism. Beneath the surface, mushroom-producing fungi have a network of mycelium—thin branching fibrous filaments (hyphae) that make up the “root system” of the mushroom. The mushroom mycelium digests surrounding organic materials (like decaying wood), gaining strength and growing larger. Fruiting begins when mature mycelium senses environmental changes in humidity, temperature, oxygen levels, or light.
Fruiting starts gradually as portions of the mycelium condense and become tiny balls of tightly packed tissue called primordia, which mature into adult mushrooms. Some species of mushrooms mature in just a few days, while others can take weeks to reach their fully developed phase.
Mature mushrooms are packed with spores, which they release by the end of their life cycle. These mushroom spores land on organic materials (substrate) and start the life cycle again, germinating and becoming hyphae which converge and become new mycelial structures.
Most methods of at-home mushroom cultivation start with inoculation (introducing mushroom spores to a substrate) while commercial mushroom growing kits come with pre-germinated bags of substrate that may have fully mature or almost mature mycelium that are ready for fruiting.
Main Stages of Mushroom Growth:
- Spores are introduced to substrate. This stage is also called “inoculation”.
- Spores germinate and individual hyphae form.
- Sexually compatible hyphae meet and form mycelium.
- The mushroom mycelium matures by digesting organic materials and growing larger, colonizing more and more of the substrate.
- Fruiting is triggered by a change in humidity, oxygen, temperature, or light.
- Primordia form.
- Primordia mature into adult mushrooms.
- Adult mushrooms drop spores and eventually decay—or you eat them!
No matter which mushroom growing technique you use, these basic steps remain the same. You’ll also need to thoroughly clean your environment before you begin growing mushrooms. Contaminants like mould or bacteria can destroy your grow, so keeping materials and your growing space clean is essential.
What Is The Best Way To Grow Mushrooms?
You’ll find plenty of disagreement in the world of both professional and amateur mycology when discussing the “best” method of growing mushrooms. Each species requires slightly different conditions, but most of the common edible and medicinal mushrooms can almost universally be grown using the same basic techniques. Which technique (or “tek”) you prefer will all depend on what you find most successful, but some methods are undeniably easier or more beginner-friendly.
Here you’ll learn two basic techniques for growing your own mushrooms:
-
PF Tek (Psilocybe fanaticus technique)
-
Bulk growing (AKA monotub tek)
What Types of Mushrooms Can Be Grown At Home?
Thousands of mushroom species exist, but only a few are safe to eat, and even fewer are easily cultivated. Some are easier to grow than others, but most edible mushrooms found in the grocery store—and the magical variety—can be cultivated at home. Common mushroom varieties that you can grow at home using the techniques described here include:
-
Enoki mushrooms
-
Lion’s mane mushrooms
-
Maitake mushrooms
-
Magic mushrooms (Psilocybe cubensis)
-
Oyster mushrooms
-
Portobello mushrooms
-
Shiitake mushrooms
-
White button mushrooms
Pre-made mushroom kits for shiitake mushrooms, lion’s mane, and oyster mushrooms, in particular, are readily available from companies like North Spore and Grow Mushrooms Canada. You can also purchase spore prints and syringes to grow all of these species from scratch.
The PF Tek: Here Are The Steps
PF Tek was developed specifically for cultivating Psilocybe cubensis and is considered one of the best beginner techniques. It is a good way to learn all the technical components of growing mushrooms in a relatively controlled environment. While PF Tek isn’t necessarily easy, it is an excellent primer for at-home mushroom growing.
PF Tek uses a combination of nutrient-rich brown rice flour and vermiculite as the growing medium. The substrate is added to sterilized mason jars fitted with modified lids for easy, contamination-free inoculation. This combination of substrates and water creates the perfect environment for the mycelium to grow and create solid “cakes” that can be tipped out of the jars.
Once you have birthed your mycelium cakes, they need to be put in a fruiting chamber—a box designed to expose the mycelium to the perfect amount of oxygen while retaining moisture and regulating evaporation. Fruiting takes place in the fruiting chamber, which can be made using a clear plastic box. The Wakeful Mushroom Cultivation Journal has guidance for making several types of fruiting chambers.
Overview of PF Tek steps:
- Prepare your growing medium (substrate).
- Sterilize and fill jars with substrate.
- Inoculate jars with mushroom spores or liquid culture using a syringe.
- Incubate until the mycelium covers the substrate.
- “Birth” the cakes of mycelium and add them to a fruiting chamber.
- Fruit the cakes by exposing them to air and humidity.
- Harvest your mushrooms.
- Optional: Rehydrate mycelium cakes for additional fruiting.
PF Tek Materials
The easiest way to use PF Tek to grow mushrooms is by buying a kit. Basic PF Tek mushroom kits include jars and lids with self-healing injection ports that allow you to inoculate and enable air exchange. You can make jars by punching holes in the lids of mason jars and covering them with micropore tape. Whether you purchase a kit or modify your own jars, you will need to sterilize them with steam or a pressure cooker. Fully sterilized PF Tek jars filled with substrate are also available from some online retailers, but pre-sterilized jars can still introduce contamination to your grow.
To grow mushrooms using PF Tek you will need:
-
250 ml glass jars with lids (fitted with injection ports)
-
Brown rice flour
-
Vermiculite
-
Water
-
Aluminum foil
-
Scissors
-
Lighter
-
Alcohol wipes or 70% rubbing alcohol (isopropyl alcohol)
-
Large clear plastic tub
-
Drill
-
Opaque plastic bags
-
Perlite
-
Misting spray bottle
Step 1: Substrate & Sterilization
To prepare the substrate, combine vermiculite, brown rice flour, and water in a 2:1:1 ratio. You should have enough water to hold the substrate together, but not so much that it drips when you squeeze it.
Fill each jar ¾ full, then fill the remaining ¼ of the jar with dry vermiculite before sealing the jar with a lid. Do not pack down the substrate before adding dry vermiculite.
Next, you’ll sterilize your jars and substrate. If you purchased a kit with pre-filled jars, you can skip this step.
To sterilize, add jars to a large pot or pressure cooker. If you are using jars modified at home, cover the lids tightly with two layers of aluminum foil to prevent water from leaking into the holes. Fill the pot with water until it reaches halfway up the sides of the jars.
If you are using a pressure cooker, use your cooker’s specific instructions for steaming at 15 PSI for one hour. If you are using a pot on the stove, cover it and heat it until the water comes to a boil, then lower it to a simmer and leave the jars for at least 1–1.5 hours.
Allow the jars to cool completely before continuing.
Step 2: Inoculation
The term “inoculate” refers to the introduction of mushroom spores (or liquid culture) to substrate. To inoculate your PF Tek jars, remove the cap from the syringe and replace it with the needle. Use a lighter to carefully heat and sterilize the needle, then wipe with an alcohol wipe or rubbing alcohol on a clean tissue.
Inject 0.5 ml to 1 ml of spore solution into each jar through the injection port or drilled hole. If you have modified your own jars by drilling holes in their lids, you’ll need to add micropore tape over each hole to keep contamination at bay.
Step 3: Incubation
Keep your PF Tek jars in a warm, dark place. Mycelium doesn’t need (or want) direct sunlight to germinate and does well at room temperature as long as your home stays between 18–26 ℃. All you have to do during incubation is occasionally check on your jars. Keep an eye out for the first signs of mycelium; it can be fluffy, or look like thin roots.
Signs of contamination can also appear during the incubation phase. The Wakeful Mushroom Cultivation Journal covers common types of mushroom contaminants and how to identify them. Contaminated jars are not viable and need to be disposed of.
During this time, use the Mushroom Cultivation Journal to reflect on the journey so far. How did you feel about the process that you just completed? Were there any challenges that came up?
Step 4: Make a Shotgun Fruiting Chamber
Mushrooms can be fruited outside of a fruiting chamber, but using a fruiting chamber improves environmental conditions like temperature and humidity to give you better yields. Fruiting chambers also keep mess to a minimum should your mushrooms drop their spores before you manage to harvest them.
To make a shotgun fruiting chamber (or shotgun terrarium) you will need a plastic tub, a drill, micropore tape, perlite, and a clean, opaque, plastic bag.
Makes marks for drilling every 5 cm on all four sides of the plastic tub, but not the lid or bottom. Drill the holes, then cover each hole with micropore tape. Line the bottom of the tub with a plastic bag for easy cleanup, then add a 5–10 cm layer of moistened perlite. Cover with the lid and your fruiting chamber is done.
PF Tek cakes can also be used for bulk growing, but putting them in a fruiting chamber is the most traditional method.
Step 5: Birthing & Fruiting
Once the mycelium covers the entire surface of the cakes it is time to birth them. Cut squares of aluminum foil, slightly larger than the mouth of the jars. Remove the lids from the jars and tip the cakes out onto the squares of foil, then transfer them to your shotgun terrarium.
Spray the sides of the fruiting chamber with water before covering.
Step 6: Mist & Fan
Twice a day (morning and night, ideally), use the lid of the fruiting chamber to fan the cakes with fresh air. Then, mist the sides of the chamber with water using a spray bottle and replace the lid. This process mimics the fruiting triggers that mushrooms encounter in nature, signalling to the mycelium that it is time to produce primordia.
Step 7: Harvest
Within a few days or weeks, you’ll see primordia that develop into mature mushrooms. Gilled mushrooms—like Psilocybe cubensis—should be harvested before the veil separates from the mushroom caps. The veil is connected to the rim of the mushroom cap and the top of the mushroom stem. When the veil breaks and the mushroom caps open completely, they drop their spores, which can be very messy. Open mushrooms can still be harvested, but you shouldn’t wait too long after spore dispersal to collect the fruiting bodies.
You can use a sharp knife or your hands to harvest your mushrooms. To use a knife, gently hold the top of the mushroom and slice as close to the cake as possible. To harvest with your hands, grip the stem of the mushroom and gently twist it until it comes away from the cake.
Don’t forget to take spore prints of your home-grown mushrooms in your Mushroom Cultivation Journal, allowing you to reminisce about the beginning of your mushroom farming journey and admire your progress years later.
Step 8: Soak & Fruit Again
PF Tek cakes can be fruited multiple times, but they become dehydrated after each fruiting. Briefly soaking the cakes in water before returning them to the fruiting chamber can revive them. To get multiple flushes, simply repeat the mist and fan process until the cakes no longer yield fruits. On average, cakes should yield 2–3 flushes, but new growers may struggle to get a second or third flush.
Bulk Grow: Grow Even More Mushrooms From Home
Bulk-growing edible mushrooms is a straightforward way to maximize your mushroom spawn. You can even turn PF Tek cakes into a bulk grow by breaking the cakes up and mixing them with a secondary substrate. Bulk growing can be done in a “monotub” (a plastic tub), a bucket, or even a plastic shoebox, and you can customize your recipe depending on which mushroom varieties you are growing. For example, you could replace the brown rice flour in PF Tek with hardwood sawdust or wood chips for fungi species like oyster mushrooms and lion’s mane.
Bulk growing always starts with mushroom spawn, or fully myceliated substrate like grain, coffee grounds, sawdust, etc. Most people use grow bags, which can be purchased pre-sterilized or made at home, but you can also use PF Tek cakes, Uncle Ben’s Tek, and other methods of germinating mushroom spores. Inoculating grain bags is very similar to inoculating PF Tek jars, and bulk grow bags are designed with self-healing injection ports. Once you have your mushroom spawn, the bulk grow begins.
Overview of Steps for Bulk Growing Mushrooms:
- Create mushroom spawn by inoculating and incubating a grain bag, PF Tek jars, rice bags, or any other substrate.
- Mix and pasteurize your bulk grow substrate.
- Prepare your fruiting chamber—a large plastic tub or bucket is most common.
- Spawn to bulk—mix the mushroom spawn with the bulk substrate and add to the fruiting chamber.
- Incubate—the bulk substrate becomes myceliated.
- Fruit the mushrooms by exposing them to air and humidity.
- Harvest your mushrooms.
- Optional: Rehydrate for additional flushes.
- The Wakeful Mushroom Cultivation Journal has a far more in-depth guide to bulk-growing mushrooms, but this overview will get you started.
Bulk Grow Materials
As with PF Tek, you can purchase bulk mushroom growing kits that include everything you need to bulk grow. The easiest way to bulk-grow mushrooms is to purchase a pre-myceliated substrate bag. These “cut and mist” style bags have already been through the mushroom spore germination and incubation process, and can simply be cut open and misted to grow mushrooms directly from the bag. For the bulk growing method, you can mix these pre-myceliated bags with bulk substrate, then immediately enter the second myceliation period.
The more laborious method is to create your own mushroom spawn by inoculating and incubating your own mushroom spores. Other than the supplies you’ll need to make grain spawn (see PF Tek above), you will need the following items to bulk-grow mushrooms:
-
Mushroom spawn
-
Fruiting chamber (monotub, bucket, shoebox, etc.)
-
Bulk substrate (e.g. coco coir, vermiculite)
-
Black plastic bags
-
Misting spray bottle
Step 1: Inoculate & Incubate Mushroom Spawn
Inoculate a grain bag, PF Tek jars, Uncle Ben’s rice bags, or any other substrate of your choice with a spore syringe, liquid culture, or myceliated agar and incubate as usual. If you purchase a pre-myceliated grain bag, you can skip this step.
Step 2: Prepare Bulk Substrate
Once your spawn is fully myceliated it’s time to make your bulk substrate. Shrooms (Psilocybe cubensis) grow well in a combination of coco coir and vermiculite, but some people like to add manure or gypsum for additional nutrients. If you are growing wood-eating mushrooms, you may want to add sawdust or wood chips to your bulk substrate.
PhillyGoldenTeacher—a YouTube creator and mushroom growing educator—has a tried and true bulk substrate recipe that works well for magic mushrooms. The recipe involves mixing coco coir, vermiculite and optional gypsum in a bucket, pouring boiling water over it to pasteurize, and allowing it to sit, covered, for 12–24 hours. Pasteurizing your bulk substrate (if not purchased from a mushroom-growing supplier) is important to eliminate contaminants.
You can also find an excellent guide to pasteurization in the Wakeful Mushroom Cultivation Journal.
While it might be tempting to use dirt from your garden or potting soil, these aren’t good substrate choices for home-growing fresh mushrooms.
Step 3: Prepare Your Fruiting Chamber
Some mushroom cultivators like to modify their fruiting chambers, drilling air holes or adding filters to enhance airflow. However, modifying your fruiting chamber isn’t necessary, and you can easily bulk-grow mushrooms in a fruiting chamber that has no holes or built-in airflow.
If you are modifying your fruiting chamber by adding air holes, cover them with micropore tape at this stage.
If you are using a clear fruiting chamber (which is recommended), line the bottom with a black plastic bag. This will help prevent the mushrooms from pinning on the sides and bottom of the substrate and concentrate primordia on top of the substrate.
Step 4: Spawn To Bulk
Mix the fully myceliated mushroom spawn with the bulk substrate until thoroughly combined. Grain spawn usually needs to be broken up by hand, but be gentle to avoid causing too much bruising to the mycelium. Spread the mixture of spawn and substrate in an even layer in your fruiting chamber.
You can finish this process here or add an optional casing layer. Casing your substrate protects the mycelium from fruiting triggers while it incubates and covers the surface of the bulk substrate. Casing is done with a thin layer of dry coco coir, no more than ¼ as thick as the bulk substrate.
Whether you add a casing layer or not, finish this step by misting the substrate and sides of the fruiting chamber generously and topping it with a lid.
Step 5: Incubate Bulk Substrate
There is one very important rule during this step: don’t open the fruiting chamber.
During this stage, the bulk substrate is going through myceliation, and should not be exposed to additional oxygen. Oxygen will trigger fruiting, and you don’t want to try to fruit until the bulk substrate has been fully myceliated. Giving the substrate this time to incubate will give you larger flushes.
Step 6: Fruiting
Once the bulk substrate is myceliated and you can see primordia forming on the surface, it’s time to introduce fruiting conditions. If you are using a modified fruiting chamber with holes, you can now remove the micropore tape. If you are using an unmodified fruiting chamber, flip the lid upside down—the small gap between the lid and the rim of the chamber will allow for continuous air exchange.
Mist the sides of the fruiting chamber twice a day (morning and night), allowing the mist to “rain” down onto the substrate but not spraying the substrate directly. Spraying the substrate directly can bruise and stall the mycelium. Follow each misting with a few seconds of fanning using the lid of the fruiting chamber.
Track data like temperature, humidity, and other observations in your Mushroom Cultivation Journal.
Step 7: Harvest Your Bulk Grow
Once your mushrooms reach maturity, it’s time to harvest! You can use the same technique used for harvesting mushrooms grown with PF Tek: slice them at the base with a sharp knife, or twist and pull them by hand.
Step 8: Rehydrate & Repeat
Rehydrate your substrate and repeat steps 5–7 until the mycelia stop producing primordia. 2–3 flushes are typical for bulk growing, but don’t be discouraged if you can only get one flush.

How To Use Your Mushrooms
A world of possibilities awaits you and your home-grown mushrooms. Fresh culinary mushrooms are delicious in soups and pasta dishes, used as meat alternatives, or simply eaten alone, fried or sauteed with a little oil or butter, salt, and pepper. Medicinal mushrooms can be taken fresh, dried, powdered, or in tincture or extract form. All varieties of edible mushrooms can be preserved with simple drying and can last for years when properly stored. When it comes to using your mushrooms, the sky’s the limit.
The Wakeful Mushroom Cultivation Journal features recipes for culinary and medicinal mushrooms, and includes step-by-step instructions for making your own tinctures, extract powders, and mushroom-based meals.
Recipes
Culinary mushroom varieties like enoki mushrooms, portobello mushrooms, and maitake mushrooms can be expensive at the grocery store. Once you start growing your own and taking spore prints, you can always have gourmet mushrooms on hand. Culinary mushrooms are often best used fresh, but varieties like shiitakes are also excellent when dried, especially when used for stock or soups.
Tinctures
Mushrooms are delicious, but they can also have medicinal properties. Distilling medicinal mushrooms into tinctures or extracts helps to isolate and concentrate the key compounds that benefit your health. Tinctures also allow you to preserve active ingredients, preventing quality decay. The Wakeful Mushroom Cultivation journal includes instructions for several methods of making tinctures and extracts that are beginner-friendly.
Microdosing
Microdosing involves taking imperceptible doses of magic mushrooms to enhance creativity, focus, emotional openness, and more. Setting intentions for microdosing can be very powerful on its own, but when you set intentions for mushrooms you grew yourself, you add a new layer of meaning.
In fact, microdosing mushrooms that you grow yourself can be even more meaningful than microdosing on its own. You already have a strong connection to the mushrooms because of the cultivation process, and the time and effort you put in before consuming them adds a whole extra layer of intentionality to your microdosing experience.
Macrodosing
Macrodosing mushrooms can help open you up for emotional processing, be a catalyst for mystical or spiritual experiences, and dismantle internal barriers. Intended to create hallucinogenic effects, macrodosing can be an intense experience, but immensely rewarding and transformative, too. Using practices like psychedelic integration to revisit and examine macrodosing experiences can teach you even more, especially when you are taking mushrooms you grew yourself.
Through the process of growing your mushrooms and journaling about the cultivation experience, you might also think about your future intentions for macrodosing. How does knowing that you cared for and cultivated the medicine you plan to consume change the macrodose experience?
Knowing how to grow mushrooms can make macrodosing and microdosing more accessible and affordable, and allow you to dose more intentionally without needing to worry about sourcing.
How To Grow Mushrooms At Home FAQ
What’s the best location in my home to grow mushrooms?
Mushrooms grow well at room temperature and don’t need direct sunlight, so you can grow mushrooms virtually anywhere in your home. The place you choose should be warm but not hot and should have some source of light. Light helps the mushrooms know which direction to grow in, but mushrooms don’t photosynthesize like plants, so they don’t need special lighting.
What temperature is needed to grow mushrooms?
Most mushrooms can thrive at average room temperature, and as long as your home is not especially cold, you won’t need any special temperature controls. Some mushroom growers like to use heating pads or heat lamps if they live in cold climates or drafty homes, but this isn’t necessary for most home growers.
How long does it take to grow mushrooms using the PF Tek?
Growing mushrooms with PF Tek can take anywhere from 4–8 weeks or more, depending on the quality of your mushroom spores, environmental conditions, experience, and luck.
Can you take spore prints at home?
Yes! Taking spore prints is as easy as laying a mushroom on a piece of paper, gill side down, then covering it with a cup or bowl. The mushroom will release its spores, leaving a print on the paper. The Wakeful Mushroom Cultivation Journal has pages dedicated to taking spore prints with dark and light paper for different spore colours.
Can you spore print oyster mushrooms?
Yes! Oyster mushrooms can be printed just like any other gilled mushroom.


Comments